The Snapmaker U1 zero waste 3D printing system combines precision engineering with practical waste reduction. This guide covers real-world setup, filament management, and how to get clean prints with minimal scrap material.
Snapmaker U1 Zero Waste 3D Printing Basics
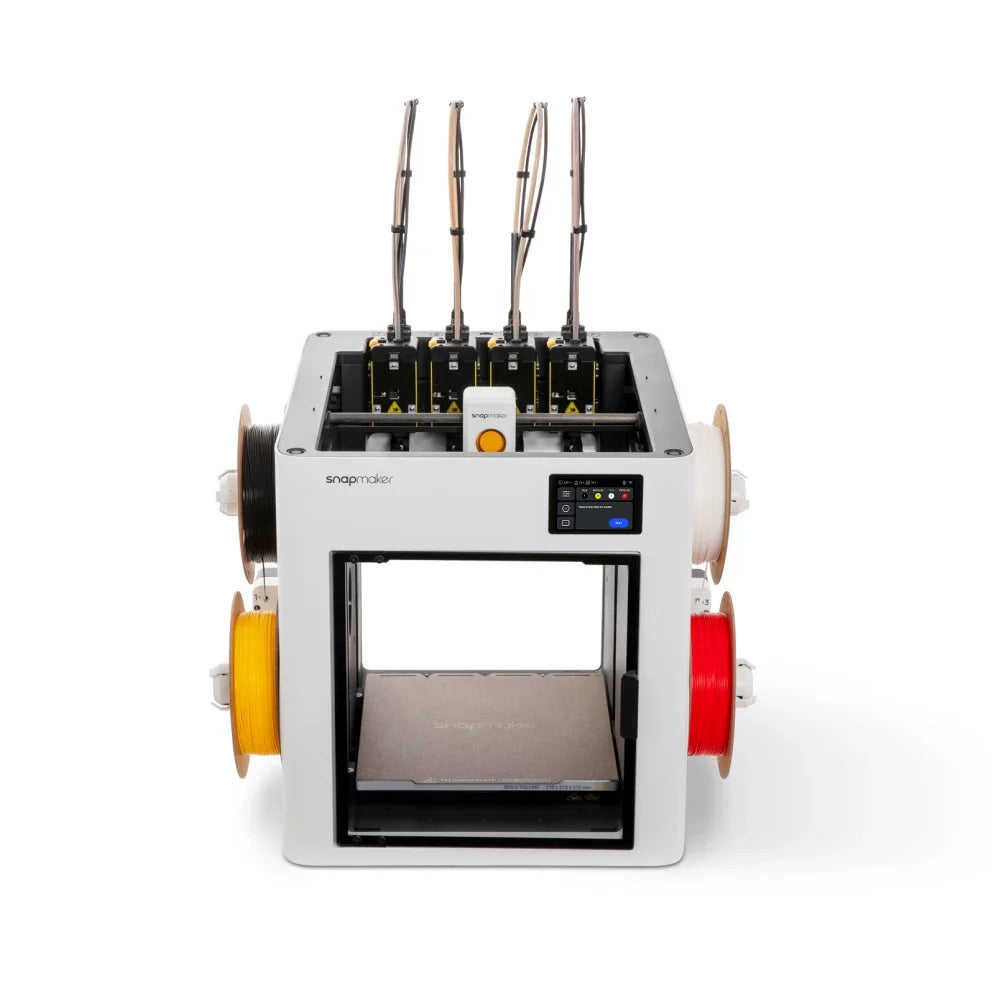
The Snapmaker U1 delivers reliable multi-tool performance for serious hobbyists. Its modular design lets you switch between 3D printing, laser cutting, and CNC milling without tool changes. The print platform handles standard materials efficiently while supporting smart filament handling.
Zero waste printing starts before your first layer. Proper bed leveling prevents failed prints that waste material. The U1’s auto-leveling sensor reduces first-layer failures significantly. You’ll see better success rates when calibrating nozzle height correctly.
Snapmaker’s filament tracking system monitors your spool consumption in real time. This prevents mid-print runouts that produce unusable parts. The enclosed build chamber maintains consistent temperatures for stable extrusion.
If you want to explore this further, check out: Bambu Lab A1 Mini.
Snapmaker U1 Filament Management Strategy
Material waste happens during supports, failed prints, and calibration runs. The U1 includes removable support structures that minimize material loss. Tree supports use less filament than traditional linear patterns.
Print your test models at reduced size first. A 50% scale test uses one-eighth the material of full-size prints. This catches design issues before committing to complete jobs. Save your failed prints for recycling or material reuse.
Keep detailed records of successful print settings. Reusing proven profiles eliminates troubleshooting waste. Document nozzle temperature, bed heat, and print speed for each filament type you use regularly.
Snapmaker U1 Review From Maker Perspective
Real makers appreciate the U1’s reliability and precision. The 0.4mm nozzle produces sharp details on small parts. Bed adhesion stays consistent across 100+ consecutive prints without resealing.
The software interface responds quickly to design changes. You can pause, adjust, and resume prints mid-job without losing position. Network printing via USB or local connection works flawlessly for batch jobs.
Build volume of 128 x 128 x 135mm suits functional parts and prototypes perfectly. This size range covers most maker projects without requiring multiple printers. Check Printables for U1-specific designs from the community.
Minimizing Support Waste on Your U1
Support structures consume 15 to 40 percent of your filament on overhanging parts. Reorient your model to reduce overhangs before slicing. Even small angle adjustments cut support material dramatically.
Use Snapmaker’s built-in support editor to place supports manually. Target specific areas instead of auto-generating supports everywhere. Delete unnecessary supports in steep angles where parts are already stable.
Water-soluble supports save time if you use PVA or HIPS materials. The U1 handles dual extrusion nozzles for mixed-material printing. Soak finished parts in warm water to dissolve supports within hours.
Final Thoughts
The Snapmaker U1 zero waste 3D printing approach combines hardware features with smart printing habits. Start with proper calibration, maintain detailed notes, and test designs at smaller scales. Every successful print comes from preparation and planning.
Zero waste doesn’t mean perfection on your first try. It means learning from each print to waste less overall. Your U1 supports this workflow with tools that catch problems early and minimize material loss throughout your making journey.
Snapmaker U1 Zero Waste 3D Printing – Frequently Asked Questions
What makes Snapmaker U1 good for zero waste printing?
The U1 includes filament weight tracking, auto-leveling for fewer failed prints, and removable support structures. These features reduce wasted material through smarter printing from start to finish. The enclosed chamber also prevents environmental contamination during print cycles.
How much filament does the Snapmaker U1 actually use?
Standard prints use 5 to 15 grams depending on your object size. Support structures add 20 to 40 percent extra. Calibration prints consume about 2 grams. The software estimates total weight before printing starts, helping you plan accordingly.
Can I recycle failed Snapmaker U1 prints?
Absolutely. PLA and PETG prints grind down nicely for filament recycling services. Many makerspaces accept sorted plastic scraps. Keep failed prints separate by material type and store in dry containers.
What’s the best filament for minimal waste on U1?
PLA offers the best success rate for beginners, resulting in fewer failed prints overall. PETG performs reliably once you dial in temperature. Avoid complex materials until you master basic settings to reduce costly material waste.
How does tree support reduce waste on Snapmaker U1?
Tree supports branch like actual trees instead of solid pillars. This design uses 30 to 50 percent less material than traditional linear supports. The U1 slicing software generates tree supports automatically when enabled in advanced settings.
Leia também sobre Impressoras 3D
- Snapmaker U1 Zero Desperdício: Review Completo da Impressora 3D
- Configuração Bambu Lab A1: Guia Completo do Zero à Primeira Impressão
- 10 Produtos Lucrativos para Imprimir em 3D e Vender em 2026 — com Margem Acima de 200%
- Como corrigir problemas na primeira camada da Bambu Lab A1 e A1 Mini (Guia completo)